Sunday, June 17, 2012

Knit your own Cat. Yup, you read it right.Knit your own Cat.

 If we didn't have our own (actually we have two but one is rather allusive)...


I would definitely relearn to knit just so I could knit my own cat! Ooo then I wouldn't have to do any kitty litter-hmmm... Apparently you can knit your own dog too! I've seen knit the royal family, zombies, mini hot dogs and gnomes. What will they think of next?


Wednesday, June 13, 2012

I don't think there is anything wrong with quilting being like crack!

It's obvious I love to quilt but sometimes I feel like I'm a drug pusher. I want everyone to love quilting and fabric. Here, have a few fabric samples, for free...sucker ; ) I know some people don't get the addiction but
once your hooked your hooked.

May's block for Holly sewn by Chris

Have I told you I recently conned my husband Chris into quilting?

First time embroidering ever. Pretty good, hey?

It kind of started out as a joke, especially since we don't have any guys in our guild (Fraser Valley Modern Quilt Guild).When Cynthia mentioned to me she was going to start her Fab Bee I volunteered him.We snickered through email but when I told him that I volunteered him he became serious and said, "I'd do it." Wha-huh, you will, um okay! That was particularly easy.

We were asked to also embroider where were from on the signature block. I was going to put Mission because it's shorter (and technically we live in Mission-long story) but because Chris put Maple Ridge I figured I should too!
 
I don't know if he has been totally hooked but he is taking it very seriously and got quite annoyed with me when I sewed a couple of seams on his block-fair enough.
 
My block for Holly

My youngest son has now mentioned he'd like to learn now too-nice! I'm not sure if it's because he's seen his dad do sewing or if it's all my influence but I'll take all the credit ;)

My drawing for the month in yellow, my favourite colour. We were both given our favourite colours, how did Holly know?


Is there anyone you're trying to convert? How is is going? Are they putty in your hands or are you going to have to give them some more free samples?

Chris admitted to me he didn't like some previous embroidery I did (it was too loopy and made him cringe-such an expert now, lol!) so I thought I better up my game!


Thursday, May 24, 2012

We're all a little lost if we don't have our Queen Bee anymore aren't we?

These are blocks for Cynthia. She was the Queen Bee in the Fab Bee for the month of April. I had started on them earlier in the month but with one distraction after another I decided that's it! I've got to get these done! Around that same time, I found out my Grandma had fallen ill and shortly after passed away. I seriously thought I could feel my heart starting to break when I heard that she was ill and then when I heard the news that she had passed, well, I was sure it had broken. 
She was my last grandparent and a pretty special one at that. She had white hair, glasses, knitted, crocheted, baked, gardened, the whole nine yards. Nothing was better than showing up on the farm to her greeting us at the door with a sunshiny smile (her whole face lit up, much like my youngest, he has her eyes) a hug and a giggle. Then she make me biscuits! She and my Grandpa were a huge influence on my life and my husband's for that matter (one of the benefits of being high school sweet hearts). They are a pretty big part of why we live on an acreage and why I love bread so much!
When something like this happens I'm amazed by people's wisdom, kindness and love (I know it sounds sappy, give me a few more sentences and I'll be done... promise!) Have you ever had someone say the most perfect thing that brings you comfort and blows you away? Here are a few I'd like to share with you:
 First my friend Trudy sent me a text saying "Sorry to hear about your Grandma. Someone told me to let all the good memories fill the empty space. I think that is true. Are you getting Dawson today?"  I had to leave that last little bit in, hee hee! And just for the record, I'll admit it. I totally ripped Trudy off in the tribute I wrote for my Grandma's funeral. It sure made my job a whole lot easier! I realize I'm being silly but actually the whole concept of what Trudy wrote inspired me to write my tribute for Grandma.
Another comment on Facebook from Kimberly hit it right on the head when she said, "sweet friend, I can't even imagine. I absolutely adore the one Grammy I have left, and know the day we say goodbye to her will break my heart into a million pieces... thinking of you. xx".

So that's what happened. I felt my heart break into a million pieces which seemed pretty fitting since that was my plan for my blocks, to make a bunch of little hearts to be dispersed through out Cynthia's quilt.
 However I didn't want to fill Norm's quilt with sadness, (Cynthia is making her April blocks into a quilt for her husband Norm) so I tried not to think about the emptiness but instead to fill them up with happy memories, like Trudy said. Some are filled with memories of vast blue prairies skies, warm sweet off the bush raspberries, kittens stuffed in Grandma's slippers (hey, they fit and she never wore slippers anyways) the highlights of dust dancing around in the hay loft, walking with Grandma to the chicken coop and the feel of diving my hands deep into her flour drawer (which I always got in trouble for but was totally worth it!)

Well okay maybe I took a liberty here and was sappy for a few more than just a few sentences! Thank you to everyone who took the time to send kind words and thoughts about my Grandma ... Grandparents, they are so important aren't they.
Darn it all, after I had taken the top photos, I remembered about these buttons I had in the studio that I wanted to add!


Saturday, April 14, 2012

She's a crafty Dame!

A few weeks back our guild (Fraser Valley Modern Quilt Guild) had a booth at the Creative Stitches show in Abbotsford at the Tradex. It was loads of fun but was really a hoot was when a bunch of Vancouver people came out from the Vancouver Modern Quilting Guild (I finally met Paul, the fellow that made me the most awesome pot holders in from the last inter-guild swap!-yay! And he is just as lovely as his work). This time around we did an inter-guild mug rug swap at the Creative show and I received...wait for it.... Amy Dame's mug rug! 
Amy is super cool (and god does she know stuff, I learn something new every time we chat. Of course she knows loads about quilting but she knows loads about everything else too! Don't know something, just ask Amy she'll know!) You know how with some people it's nice to just sit back and listen to them? Amy is one of those people. So much so that we quoted her on some buttons that we made up for the Creative stitches show. They were a hot commodity and were the first ones to be snaffled up!
 
I think the next round of buttons we make should use something I heard her say at our February retreat " I sew some weird Sh*t" on my machine"! See that's why I like to sit back and listen to Amy talk, you never know when a little gem like that will spring out!

Now Amy received my Olive Juice mug rug which, as you can tell, was quite fitting because I Olive Juice Amy Dame!

Oh ya, and Amy requested I put a follow by email on my blog, so there it is in the upper right hand corner, TA DA!- Cheers, thanks for stopping by!

Tuesday, April 10, 2012

Everyone needs a little tlc once in a while (especially in August)


Hi ya, it's just after Easter and I'm still back in August with the Unscripted Bee.


Tara (her Flickr name is  tlc 2012) was September's Queen Bee. I however mixed up my months and thought she was August. In my defense... remember the postal strike last summer? It certainly didn't help me keep things straight.

Note card, drawing, signature block and the block itself.

Tara's inspiration was from a quilt is nice. Check out the little boy jumping on the bed. Ah, remember those days? Or when the sheets were thrown over you like a bubble... This block was super fun to do, I'd even go as so far to say as much fun as jumping on a bed!


 I love Tara's fabric and colour selection! I can't wait to see what the whole quilt looks like!

Saturday, March 31, 2012

Polka dot quilt for April (Unscrpited Quilt Bee)-Feel free to quilt along!


As I mentioned in a few of my earlier posts I’m part of an online Quilting Bee. Actually, I’m in two but this one, “Unscripted”, has been my first online Bee. It is an improv bee and for April I am the Queen Bee! For my quilt this month I’ve chosen polka dots for my design. The idea is that each person improvs with the coloured fabric I’ve sent them, then using interfacing makes appliqué circles and lastly sews them onto white blocks. Each person will end up making two full circles and two half circles (for the border).

If you know anything about me, you know I’m kinda lousy at following instructions! (It’s a gift, what can I say? Actually I’ve been slowing down and making quite an effort to rectify this little quirk, especially since I’ve seen one of my kids having this same tendency.) Pictures though,  I love pictures, I guess that would put me under the category of a visual learner. Because of this I decided to give it a whirl and leave instructions (with pictures!) for my Quilt Bee here. Feel free to quilt along! Promise you’ll send me pictures though... you know I love pictures ;)

Each member of the Bee will get a package in the mail that includes: 
  • A stack of coloured fabric
  • Two pieces of white fabric measuring 10” x 10”
  • Two Pieces of lightweight woven interfacing approximately 7”x 7”
  • One circle measuring 6” 1/4 printout
  • One piece of white fabric measuring 10” x 11” (for the border)
  • One piece of lightweight woven fusible interfacing approximately 8” x 7” (for the border)
  • One circle measuring 6” 1/4 x 7” (it has lines in the center of it) printout (for the border)
  • A long piece of white fabric with two blue lines on it
  • Embroidery floss
  • Instructions
  • And last but not least a little Easter treat!

First step, easy peasy: cut fabric and arrange.  No need to fussy cut anything; just keep all seams on a horizontal or vertical plane (please no curves or diagonals-thanks ;)


When you’ve sewn all the coloured fabric together, cut out two circle shapes. I have only one in the photo below (the one on the right) but you'll cut out two. (Please note you don't have to add a seam allowance just cut on the line; for both circle patterns)

Then with the second circle pattern (the one with the lines on it, on the left) cut that one out, too.


Next, place the woven interfacing, bumpy side (fusible side) toward the right side of the fabric. Sew together with a 1/4” seam.


Next, pierce the interfacing with your scissors and cut a hole (line) just enough to turn everything inside out.
(I made my cut way too big and if you cut yours too big, don't worry, it will still work). BUT WAIT!!

It's is a good idea to make your cut the hole in your interfacing  just large enough to turn the circle inside out. ( I made mine too large but it still all worked out okay!)

 
... before all three circles are ready to be turned inside out, nip around the circles with scissors. This of course will allow your circles to curve better once they are turned inside out.


Once you’ve turned everything inside out run along the circles edge with a bone folder or thingy used for poking out collars (what's that thing called anyways?) I like to finger press after I’m done this step.


Now it is time to center the circles on the fabric. I did this by finger pressing the white pieces of fabric in half twice. With the circles I did the same but when I found the center I poked a pin in it.  Then I opened everything up and poked the pin (that was already in the circle) through the white fabric where the creases met in the center.


The next step is to iron the circle in place. What I’ve found a little annoying with this method is that if you make your hole in the the interfacing to big it likes to squish out the sides. If that happens, I found if I start in one spot and poke the interfacing under (usually with a pin) and work around the circle doing it, usually did the trick!

Can you see the little bit underneath the circle trying to peak through? The little stinker!

If you cut a small hole in the interfacing instead of a big one (like the one I did ;)
you'll get less trying to peak out and less you'll have to fiddle with.
 
Next, select a matching top-stitching thread and sew around each circle. I used my handy dandy top-stitching foot (that I LOVE) for this. It works out to 1/8” from the circles edge. I pulled my threads to the back and voila!


Two of the circles are complete! Woo hoo! Thank you, thank you!


For the circle that’s not so round and on the 10” x 11” piece of white, we’re going to cut it in half. I folded mine in half then measured it but I’m sure you would be fine just to measure yours, if you’d like.  Just like that, one cut and you are done and done! Yessss, I can’t wait to see it! Thank YOU!


This Unscripted Bee online Bee is my first and one of my favourite features is the signature block. Most times it’s a 4” x 4” block that includes the quilter's name and is pieced into the back of the quilt. For this quilt (which I’m going to keep all to myself, hee-hee) I'll be sending along embroidery floss and a long strip of white fabric with blue lines on it. I would love for everyone to embroider the name of their blog or Flickr name followed by a dash and their first name. My plan to use all of these embroidered names for the design on the back of the quilt, sewing them horizontally and vertically. This has been a pretty amazing adventure and I want to remember each and every one of you! Again, thank you SOOO much!

Helpful hints for the embroidery: The strip of  fabric is narrow but if you baste some fabric from your scrap pile on either side it will fit in a hoop. Don't have a hoop, no problem, just use some stabilizer behind your fabric and that will help the fabric from flopping around and make it easier to work on.


Friday, March 23, 2012

"Olive Juice" Fraser Valley and Vancouver Modern Quilt Guild Meet up Mug Rug Swap


Yup, you read it right, "Olive Juice"! If you mouth the words "Olive Juice" it looks like you're saying " I Love You"! Did you ever do that in elementary school to someone you had a crush on? Then did you run away giggling, with your friends in tow? I had totally forgotten about doing that until Cynthiaf mentioned a client using it on their website.


The Fraser Valley Modern Quilting Guild has a booth at the Creative Stitches show, today and tomorrow. Tomorrow we are having a meet up with some of the members from the Vancouver Modern Quilt Guild and we are exchanging mug rugs. 


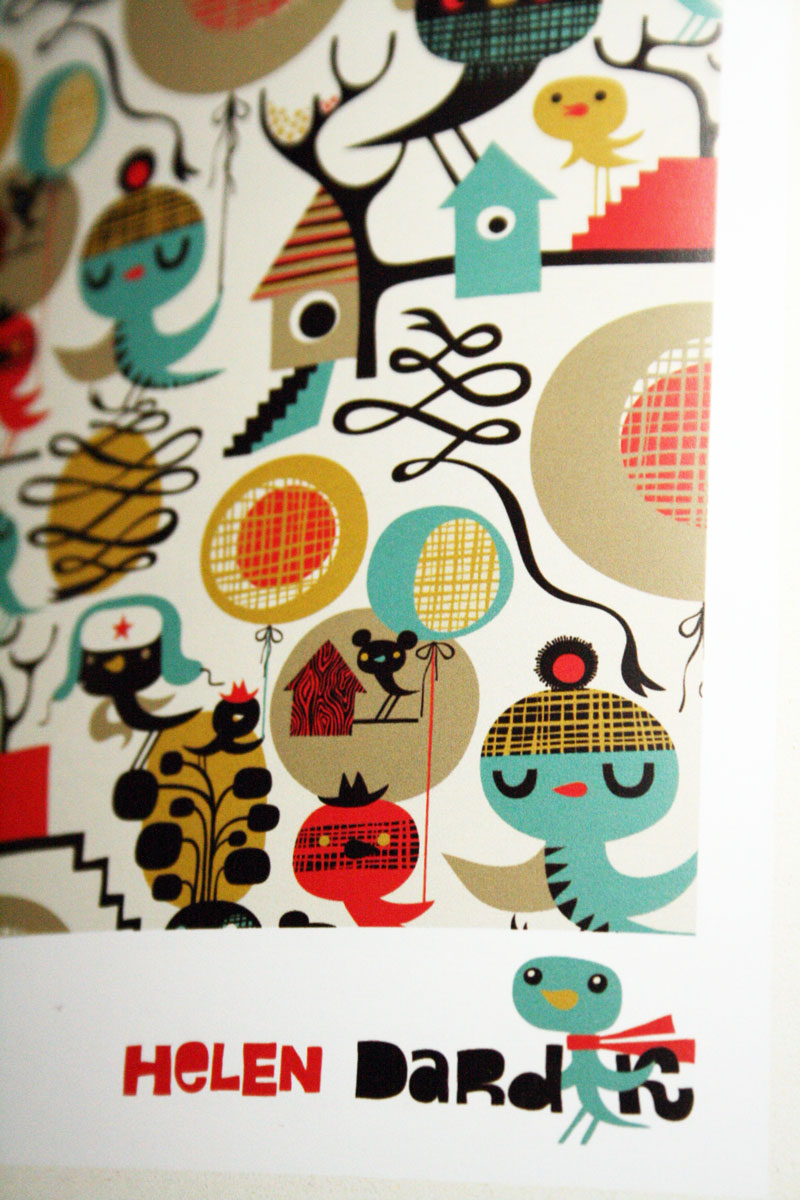
This was the first half of my inspiration for my mug rug, an illustration by Helen Darkin. I love the balloons and wanted to play with circles. Originally I was thinking flowers but when I started playing with colours it was looking more like an olive. Then the story from Cynthia popped into mind, so I went with it!


At first I was going to applique the circles but they were too small and became bulky to work with. I decided to bite the bullet and inserted the circles. In fact this was my first attempt at a set-in-circle. It was of course challenging, especially since I didn't want perfect circles but olive-y shaped ones. It wasn't nearly as painful as I thought it would be. I'm hoping to do a bigger quilt inspired from this illustration (anyone from the Fab Bee, hint, hint) at some point, but not using set-in-circles, but applique instead.
 
 
On the back I hand embroidered my blog address so the recipient can look up what the heck "Olive Juice" means. I'm really looking forward to meeting up with our Vancouver Modern Quilt Guild homies and I'm so proud of our little guild. Our display came together nicely, it looks great and so many members came out to volunteer! I just want to tell each and everyone, Olive Juice!